Readout Electronics and Instrumentation
The electronics consists of two separated electronic boards, one with the digital part and the microcontroller core, and a second one consisting of the analog front end amplifier and the current source to bias the photodiodes. The digital board is very simple and compact, designed around a STR7 32Bit Arm microcontroller, with oscillator, USB port and all peripherals accessible through a astandard 2,54 strip connector. This board is produced by Olimex, and is suitable for prototyping or OEM instrumentation.
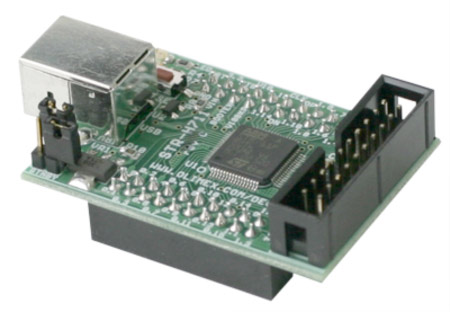
Digital core board. All peripherals are directly accessible through the external connectors, as the jtag for programming and debugging.
The analog board is mounted on the socket with the soldered board to board receptacle. The front end is thus very closed to the sensor, and this will lead to less noise picked up by the wiring tracks. Copper pours on the two layers are tied to ground, this will also help shielding from external noise sources.
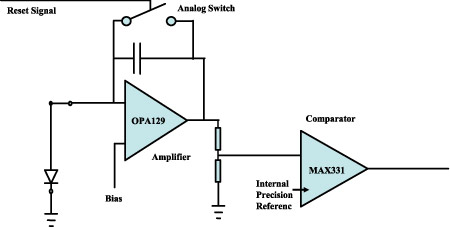
Schematic of the analog circuit featuring the photodiode, the photocurrent integrating operational amplifier and the resetting comparator.
The analogue front end was designed to yield high dynamic range and low noise performance. It is based on a single amplifier configured as a switched integrator, that will also bias the single photodiode through its non inverting input voltage (adjustable). The integrated signal is fed at the input of a precision comparator (MAX331) that features a precision voltage reference. Once the signal goes above the referenced voltage, the output will go high and will be buffered to a microcontroller input. The microcontroller will measure the time occurring from the reset signal to the rising edge of the comparator output this time being proportional to the detected photocurrent. At the same time the comparator will create the capacitor next reset signal.
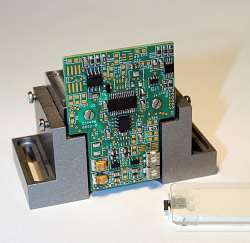 |
The analogue board mounted on the socket. The board to board receptacle is soldered from the back side of the board, fits into a socket recess and provides for the precise alignment of the cartridge to the receptacle spring contacts. |
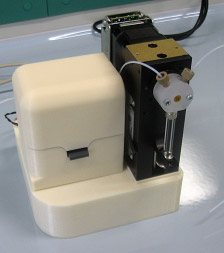
The final portable instrument in addition to the electronics boards, included an external micropump is integrated for the supply of reagents and the sample.
 |
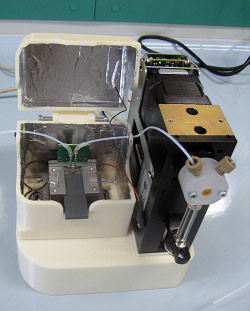 |
View of the portable instrument. Left: The lid is closed and the receptacle sticks out from one end. Right: The lid is open the external fluidic connections between the pump and the cartridge are shown.
Video Showing the Process of Measurement
You can also download the video in the original quality from here.